How to update your kitchen with a few simple DIY details

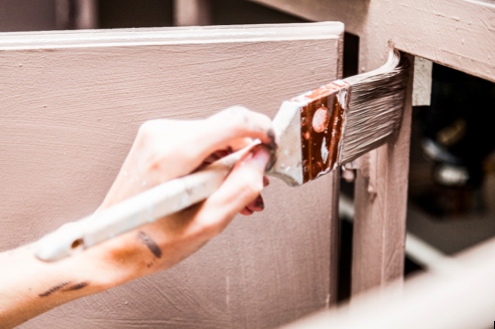
Bored with your kitchen? Want to change the style, but don't want the expense of a complete refit? Don’t worry; you can make a real difference to your kitchen by making a few simple changes and quickly have your kitchen looking like new. Update and repair your worktops Depending on the finish of your worktop, having them repaired is a much less costly way of refreshing its appearance than installing a brand new one. However, unless your worktop is natural wood it would be best to find a local surface repair company to do this for you. If your worktop is natural timber, it is much easier to update its finish yourself. For example, if there are scratches or stains on the surface, simply sand down the damaged area, clean with a lint-free cloth to remove any dust, then re-oil. Natural contraction and expansion is to be expected with a timber surface and this can sometimes create a small crack or split. If so, you can use a moisture resistant filler or wood wax to pack the split, sand once it’s dry/set and re-oil. Cabinet doors Painting kitchen cabinets is, like any painting job, a simple task. But mastering the perfect glossy finish is all in the prep work. That means properly cleaning, sanding, and priming every inch of the surface, or the finish colour won't stick well. Once your kitchen surfaces are protected, flag each cabinet door or drawer and its corresponding opening with matching numbered pieces of tape so you'll know exactly which piece goes where. Remove all pulls and knobs, and then unscrew hinges from both the cabinet boxes and the doors. Pull out the drawers and, if possible, unscrew the fronts. Next, wipe down the doors, drawer fronts, and cabinet frames wherever you plan to paint and using a putty knife, fill any dings or divots with wood putty. Sand the putty smooth and rough up the cabinets' finish. Wipe over the sanded areas, removing any dust before you begin to apply your primer. When priming, brush first against the grain and then with it. Make sure the primer is dry to the touch before flipping the pieces over to paint the other side. Once the primer has dried for several hours, smooth away any brushstrokes on the panels and other flat surfaces using sandpaper. Wipe them down again to remove any dust before applying a second coat of primer and leaving them to dry. To apply your finish colour, use a new chisel-tipped paintbrush, going with the grain, and only apply a thin coating to avoid drips and uneven coverage. Leave the doors and drawers to dry and add a second coat if necessary. Once the cabinets have totally cured (another day or two, depending on the weather), re-install your fresh new cabinets and, not forgetting to re-attach the handles! Lighting The lighting in any room can really make a difference to its style and atmosphere, It is also a very simple detail to update, and there are a huge number of styles available with very reasonable price tags. For example, for less than £30, you can add ambiance to your room with a striking candle chandelier that accepts regular pillars or tea lights. Pendant lights are also a great way to add personality to your kitchen. They can be hard-wired or plugged in and you can easily change the shade. Popular options include a rice paper lantern, artichoke-shaped shade, dome or regular shade in brushed aluminium or frosted glass. A halogen track light system makes it easy to spotlight a specific area. The lights can be adjusted to suit your needs whether it is task lighting over an island or a spotlight for a special cabinet. With these quick and simple updates and modifications your kitchen could be looking as good as new in time for Christmas!