How to Build Timber Pavers
 Offering an alternative to concrete paving slabs, timber pavers bring a more natural, timeless look to a garden. You can easily transform a bare garden space into a stylish pathway, whether on grass or gravel. Follow our simple DIY guide and you’ll have your timber pavers in place in no time. What’s more, you can cut each paver to whatever size you like and paint them different colours, truly customising your garden. Grab your safety goggles and a thick pair of gloves to get started. You’ll need the following tools and materials:
- Treated Timber
- Drop saw or hand saw
- Electric drill (including 5mm bit and 16mm spade bit)
- 150mm timber drivers
- Measuring tape
- Shovel
- Clamp (optional)
Step 1: Measure Your Timber
First up you’ll need to measure your timber, marking the wood so you know where to cut. Experiment with different sizes of pavers for a more rustic look - or stick to the same size for each paver if you want an ultra sleek, uniform look. Make sure that the timber you use is pre-treated to avoid rot. That way, your pavers will last through the seasons.
Step 2: Cut the Timber to Size
 Now you’ve decided on what sizes of pavers you want, it’s time to cut your timber to size - you can even take advantage of George Hill Timber’s free cutting service. Using a drop saw or hand saw, carefully cut your timber as required. You’ll want to cut two pieces of timber of the same size for each paver – we’ll talk about joining these together in step 3.
Step 3: Join the Timber into Pavers
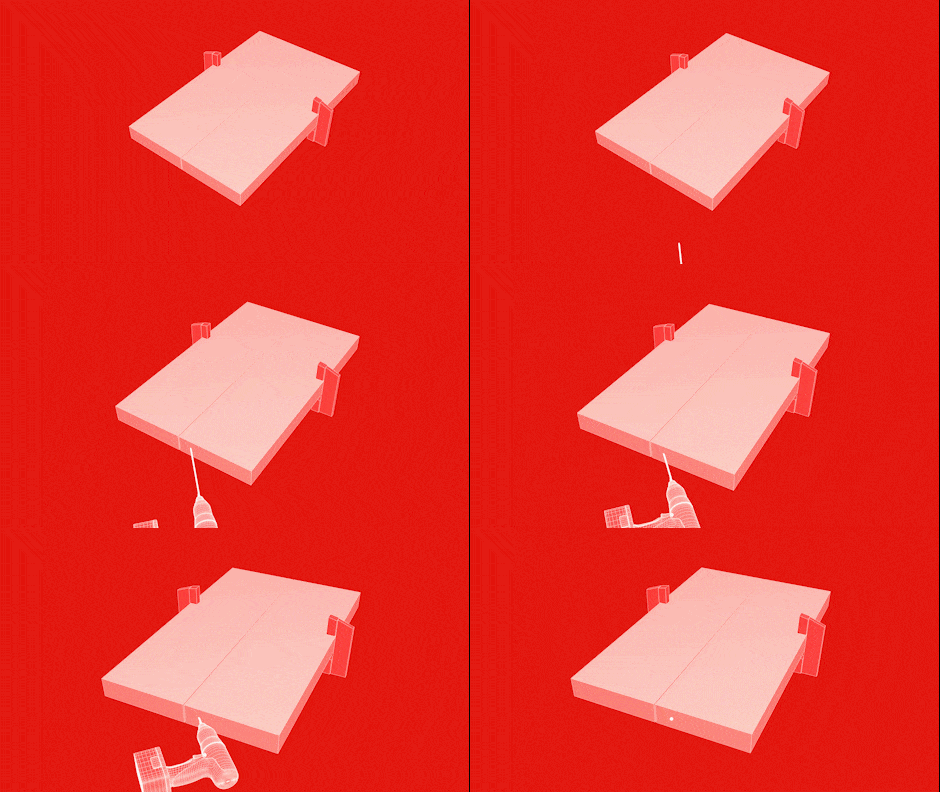
If you’ve got a clamp, clamp your two pieces of the same size timber together on your workbench. Otherwise, you’ll need someone to lend a hand to keep your timber in place while you drill. Using your electric drill, drill a 16mm wide spade hole on the outer edge diagonally through your right piece of timber and into the left. Then drill a 5mm pilot hole in the same place. Secure your timber pieces with a 150mm timber driver. Turn your paver around and repeat the process on the opposite side.
Step 4: Lay the Pavers in Place
Once you’ve secured all of your sets of timber, you should have your finished pavers. Now it’s time to set them in place. Lay out each paver where you want it on your lawn. Using a shovel, create a light outline around each paver. Depending on your terrain, you’ll need to dig a slight hole for each paver to sit in. Tidy things up by backfilling around each paver once it’s in place.
Step 5: Customise Your Garden
 With your timber pavers in place, you can now try your hand at other DIY gardening jobs. Why not add a touch of colour to your garden by assembling a wooden garden bed filled with a collection of your favourite plants, shrubs or herbs? Or, if you’re looking for more DIY inspiration, visit our blog for other step-by-step guides.


