How to build a partition wall

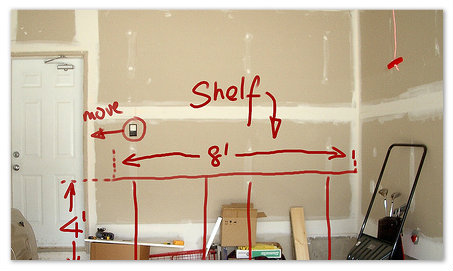
A partition wall can allow you to make the most out of your available space..
[caption id="attachment_289" align="alignright" width="182"]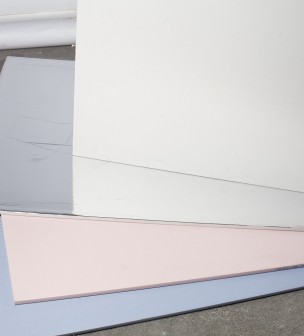 The standard board product for use in stud partitions, lining systems and ceilings.
Suitable for use in applications where normal fire, structural and acoustic levels are specified.[/caption] ..constructed either partly or fully across a room. With a basic timber framework and plasterboard surface, you can quickly and inexpensively create what is effectively a separate room. Either for a child’s playroom, a study, an en suite bathroom or separate dining area. The possibilities are limited only by your available space but with this guide you’ll be able to design and build your own partition wall in no time. The most common form of partition wall is a timber stud partition, which comprises solely of timber and plasterboard. This will require 9.5mm or 12.5mm plasterboard but bear in mind that with the thicker board, the transmission of sound will be reduced. You’ll also need 44 x 69mm finished PSE or 47 x 75mm sawn timber to create a supporting frame. This timber must be cut to length for your studs (vertical beams) and noggins (horizontal beams for support and rigidity) before beginning assembly.
Secure the head and sole plates
Using nails or screws, you will firstly want to fix head plates to any ceiling joists if they are running in a different direction to your new wall. Alternatively if you can simply run your new wall underneath an existing joist, secure using a head plate. If this isn’t possible, you will be able to install noggins between the ceiling joists to allow new fittings to be made. You can then drop a plumb bob from each end of your head plate to the floor, marking the position of the sole plate. The sole plate should be nailed directly into a timber floor or drilled, plugged and screwed into concrete.
Secure the studs and noggins
You’ll first want to mark and secure the stud which will run against the end wall. Use 100mm oval nails to secure the stud, with two driven in at an angle for each end of the stud. If you are using 12.5mm plasterboard your second stud should be 600mm away from the wall, with your third 1200mm away and so on. For 9.5mm plasterboard, replace with 400mm increments. Each stud may need to be cut to size separately and should be positioned wherever sheets of plasterboard will join.
Secure the plasterboard
Plasterboard should be position with the ivory side facing outwards, aligned horizontally and with any joins in line with timber studs. Use a wedge to lift the plasterboard so that it touches the ceiling as opposed to the floor. You can then secure each sheet with Drywall screws driven in just below the surface, at 30mm intervals around the perimeter of the sheet and 20mm around the corners.
Apply the finishing touches
After your boards are secure, you must make good any joins and screw heads. Apply a coat of jointing compound, followed by paper jointing tape and a second layer. The finish should be flush with the board surface but use a wide bladed caulking tool if not. The finish should be completely flat, so be sure to cover any nail heads and rub down afterwards if necessary. You’ll also need to fill in any joins between the old wall and new and attach coving or skirting boards to the top and bottom of the wall. After this, you can decorate your new partition wall as normal and enjoy your new look room. photo credit: Vincent Ma via photopin cc