A Guide to Shabby Chic Furniture Painting

Up-cycling tired and unwanted furniture is a great way to freshen up your home and add a rustic twist to your decor. With a lick of paint and a bit of sanding you can customise your own unique piece of furniture.
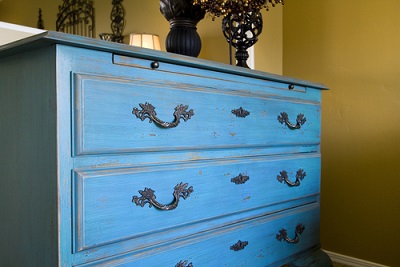
First, be sure to remove any handles, hinges or metalwork before you begin stripping the paint or varnish. Sandpaper or Nitromors are best for this. Whilst both methods are equally effective and take the same amount of time, Nitromors is best when working with heavy detail. Once it has been stripped and sanded, get rid of any dust by wiping it down with warm water and allow it to dry thoroughly. It is best to apply a coat of primer to give the paint a good base but, if the wood is in good condition, a couple of coats of white paint can be sufficient. If your original piece is dark brown then there is no need to pre-paint it, as this is the colour which will show when you begin to distress it. However, if your original piece is lighter you may want to add a coat of dark paint first. To make it easier at the distressing stage you can then rub the areas you would like to distress with candlewax before applying the top coat. Choose pale and pastel oil-based or matt paints for your top coat. Eggshell grey, for example, is a popular choice. When applying the paint always go in the direction of the grain, keeping very little paint on the brush and applying in thin coats, making sure you allow each layer of paint to dry properly before adding the next. Once you have finished, leave the paint to dry for at least 24 hours before distressing. For a naturally distressed appearance try to highlight the areas where wear and tear would usually occur. This would include any raised areas, edges, handles and the top of any detailing. To distress, use 180 grit sandpaper and sand over the areas you previously rubbed with candlewax, in one direction, repeatedly. You could also use a sharp craft knife to scrape away some of the top coat for a deeper effect. Once you are content with the finish, add a coat of wax to seal the surface and keep it in good condition. This will help protect the wood, but don't be too overzealous as an overly shiny varnish will not look authentic and shabby chic!